The C++ Programming Language
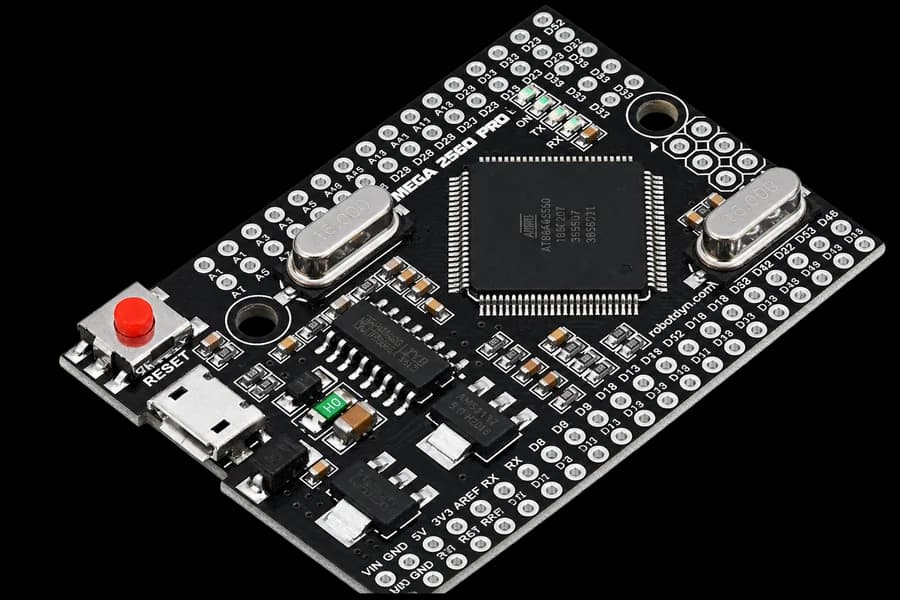
C++ is a large and powerful programming language. It can be used to create programs for computers, devices, games, and microcontrollers. Arduino uses a language based on C/C++, but Arduino IDE makes working with it easier: many complex actions are already prepared as ready-made commands. In this lesson, we will look at the basic programming foundations that are needed to control the board and the robot.
Code Writing Rules (Syntax)
In programming, it is important not only which commands are written, but also exactly how they are written. A programming language has its own formatting rules. These rules are called syntax.
Any written code is read from top to bottom: first the first command is executed, then the next one. If you swap commands, the program behavior may change.
Curly braces { } mark the boundaries of a group of commands that run together. The familiar setup() and loop() are examples of such groups. Example:
void setup() {   // Start of the block

}                // End of the block

void loop() {

}
Most commands end with a semicolon ;. It means that the command is finished. Without this command ending, the program may fail to upload, and Arduino IDE will show an error.
To leave an explanation or note in the code, you can use a comment. The program does not process these comments; they are only needed to explain something to the user. A single-line comment starts with two slashes //.
For example:
// Turn on the LED
digitalWrite(13, HIGH);
Variables
Variables play a big role in writing programs. A variable is a kind of memory cell where a certain value can be stored. Programs often repeat certain values, for example the delay time of a certain process. To avoid changing these values on every line where they appear, people use variables.
Let's look at this line:
int pause = 1000;
In this case:
intis the variable type,pauseis the variable name,1000is the value inside it.
Variables of type int store only whole numbers without a fractional part. There are many other variable types for other values: float stores numbers with a fractional part, bool stores only two states, true and false, char stores one character (the character is written in single quotes), and String stores a text string.
After declaring a variable, you can use it in the program:
delay(pause); // delay of 1000 ms, the value is taken from the variable
This is convenient: if you need to change the pause time, you do not have to search for all identical numbers in the program. It is enough to change the variable value where it is initialized.
There is also const. This keyword declares a value as constant and prevents it from being changed in the program. For example, if we declare a variable:
const int LED_PIN = 13;
Then if we try to change the value:
LED_PIN = 10;
The program will show an error because LED_PIN was declared as a constant value.
Arithmetic Operators
Arithmetic operators are needed to perform mathematical actions in a program. With them, you can add, subtract, multiply, and divide values.
Main arithmetic operators:
+- addition,-- subtraction,*- multiplication,/- division.
With them, you can work with values and variables. Let's remember the pause variable created earlier:
int pause = 1000;
pause = pause + 500;
...
pause -= 500;
First, we added 500 to the variable pause, increasing the delay by 500 ms, and then decreased it by 500 again. The first operation is written in full form: we write into the variable its current value plus 500 ms. The second is written in shortened form: pause -= 500; means the same thing as pause = pause - 500;.
These operations are useful when you need to change speed, decrease a pause, count repetitions, or process a sensor value.
It is also important to talk about the assignment operator =. The = operator is used to write a value into a variable. It does not mean "equals" in the mathematical sense. It means: put the value on the right into the variable on the left.
For example:
int speed = 100;
Here we create a variable speed that will store the speed value, and we write 100 into it. The variable value can be changed later:
speed = 150;
Now the variable speed stores not 100, but 150.
Comparison Operators
Comparison operators are needed so that the program can compare values with each other. With them, you can check whether one value is greater than another, less than another, equal, or not equal.
Main comparison operators:
==- equal to,!=- not equal to,>- greater than,>=- greater than or equal to,<- less than,<=- less than or equal to.
Let's look at an example with the already declared variable speed, which currently contains the value 100:
speed > 0
In this case, this operation will give the answer true, because the statement is correct.
In another case:
speed == 50
the answer will be false, because the value stored in the variable is not equal to 50.
It is important not to confuse = and ==. The = operator changes the value of a variable, while the == operator only compares values. The result of a comparison is always an answer: true or false.
Logical Operators
Logical operators are needed to work with several conditions at once. They help the program check not just one action, but several at the same time: for example, whether two conditions are both true, or whether at least one of them is true.
Main logical operators:
&&- logical "AND",||- logical "OR",!- logical "NOT".
The && operator is used when two conditions must be true at the same time.
For example:
speed > 0 && pause > 500
This means: the speed is greater than zero and the pause is greater than 500 ms. The result will be true only if both checks are correct.
The || operator is used when it is enough for at least one condition to be true.
For example:
speed > 0 || pause > 500
This means: the speed is greater than zero or the pause is greater than 500 ms. The result will be true if at least one of these checks is correct.
The ! operator changes a value to the opposite.
For example:
!true
The result will be false.
And if you write:
!false
The result will be true.
Logical operators are often used together with comparison operators. For example, first the program compares values, and then uses logical operators to combine these checks.
if and else Conditions
Now let's move on to conditions. They use comparison operators and logical operators so that the program can choose which commands to execute.
Thanks to conditions, the robot can react to different situations: for example, if the button is pressed, do one action; if it is not pressed, do another.
The main condition is written with the word if.
General form of a condition:
if (condition) {
  // commands that will run if the condition is true
}
The check is written inside parentheses. The result of this check is always true or false. If the result is true, the commands inside the curly braces run. If the result is false, the program skips this block.
For example:
int speed = 100;

if (speed > 0) {
  Serial.println("Robot can move");
}
In this example, the program checks whether the value of speed is greater than zero. Since speed is equal to 100, the condition is true, and the message will be printed to Serial Monitor.
If you need to describe an action for the opposite situation, use else. It means "otherwise".
int speed = 0;

if (speed > 0) {
  Serial.println("Robot can move");
} else {
  Serial.println("Robot is stopped");
}
Here the program first checks the condition speed > 0. If the speed is greater than zero, the message "Robot can move" is printed. If the speed is not greater than zero, the else block runs, and the message "Robot is stopped" is printed.
Simply put, if sets the check, and else tells what to do if this check does not pass.
Conditions can be used together with comparison operators and logical operators:
int speed = 100;
int pause = 1000;

if (speed > 0 && pause >= 500) {
  Serial.println("Settings are correct");
}
In this example, the program checks two conditions at once: the speed is greater than zero and the pause is greater than or equal to 500 ms. The command block will run only if both checks are true.
Conditions allow the program to make simple decisions. This is an important part of programming, because without conditions the robot would always execute the same commands and would not be able to react to changes.
Loops
Another important topic to discuss is loops. They are needed to repeat commands. If the same action needs to be performed several times, you do not have to write identical lines by hand; you can use a loop.
For example, if you need to print a message to Serial Monitor three times, without a loop you would have to write:
Serial.println("Hello");
Serial.println("Hello");
Serial.println("Hello");
With a loop, this task can be written shorter and more conveniently.
The for Loop
The for loop is convenient when you know in advance how many times an action must repeat.
General form of the loop:
for (start; condition; change) {
  // commands that repeat
}
Let's look at an example:
for (int i = 0; i < 3; i++) {
  Serial.println("Hello");
}
In this example, the message "Hello" will be printed 3 times.
Let's break down the loop line in more detail:
int i = 0;- a counter variableiis created. It starts counting from zero.i < 3;- this is the condition. The loop will run whileiis less than3.i++- after each repetition, the value ofiincreases by 1. This is a shortened form of the commandi = i + 1.
So the loop works like this: first i is equal to 0, then 1, then 2. When i becomes equal to 3, the condition i < 3 is no longer true, and the loop stops.
The while Loop
The while loop is used when an action needs to repeat while a condition remains true.
General form of the loop:
while (condition) {
  // commands that repeat
}
For example:
int count = 0;

while (count < 3) {
  Serial.println("Hello");
  count = count + 1;
}
Here a variable count is first created with the value 0. The loop will run while count is less than 3. After each repetition, the value of count increases by 1.
As a result, the message "Hello" will also be printed 3 times.
The main difference between while and for is that while is used more often when the number of repetitions is not obvious in advance. For example, perform an action while a button is pressed, while a sensor value is greater than a given number, or until the robot reaches the required state.
It is important to make sure that the loop condition eventually becomes false. If the condition always remains true, the loop will run forever, and the program may get "stuck" in that place.
Functions
Another important part of programming is functions. A function is a separate block of commands that can be given a name and called in the needed place in the program.
Functions are needed so that you do not have to write the same code many times. If the same set of commands often repeats in a program, it can be moved into a separate function and then called by name.
We have already seen functions before. For example, setup() and loop() are also functions. They have special names that Arduino understands: setup() runs once when the board starts, and loop() repeats again and again.
Functions can be different. Some functions simply execute commands and return nothing. Such functions usually start with the word void. Other functions can not only perform actions, but also return a result, for example a number. At the beginning of learning, void functions are used most often because they are easier to understand.
Let's look at an example function:
void printLoading() {
  for (int i = 0; i < 3; i++) {
    Serial.println("Loading...");
    delay(500);
  }
}
In this example, the function printLoading() is created. Inside it there is a for loop that prints the message "Loading..." to Serial Monitor three times. After each print, the program makes a delay of 500 milliseconds.
Let's break down the syntax in more detail:
voidmeans that the function simply executes commands and does not return a value;printLoadingis the function name;- parameters of the function are written inside parentheses
(); - curly braces
{ }show the start and end of the function command block; - inside the function there is a
forloop that repeats commands several times.
The function will not run by itself if you simply write it in the program. For the commands inside the function to start running, the function must be called by name:
printLoading();
For example, the function can be called inside setup():
void setup() {
  Serial.begin(9600);
  printLoading();
}

void loop() {

}
When the board starts, the function printLoading() will run once. It will print the message "Loading..." to Serial Monitor three times with a pause of 500 milliseconds between messages.
Values can be passed inside the parentheses of a function. Such values are called parameters. They make the function more flexible.
For example, the function can be changed so that the number of repetitions is set when it is called:
void printLoading(int count) {
  for (int i = 0; i < count; i++) {
    Serial.println("Loading...");
    delay(500);
  }
}
Now the number of repetitions is not set inside the function, but is passed inside the parentheses:
printLoading(5);
In this case, the message "Loading..." will be printed 5 times.
So the value inside the parentheses helps pass additional information to the function. Thanks to this, the same function can be used for different tasks just by changing the value when it is called.
Libraries
Programs for Arduino also often use libraries. A library is a set of ready-made functions and commands that can be connected to your program.
A library expands the program's capabilities. It adds ready-made tools that help you work with devices faster and avoid writing all the code manually every time.
The LittleRobot.h library was written for working with the Little Robot. It makes programming the robot much more convenient.
To include any library, the #include command is used at the beginning of the program.
For example:
#include <LittleRobot.h>
This line tells Arduino IDE that the program will use the LittleRobot library. After including it, you can access the functions inside this library.
Library includes are written at the very beginning of the program, before setup() and loop().
After including the library, you need to access its functions. For this, we will declare a robot object:
LittleRobot robot;
Now through the robot object, we can call functions from the library.
Let's look at one of these functions. There is an LED on the Control Deck. To control it, use the function robot.LED():
robot.LED(0); // LED is off
robot.LED(1); // LED is on
By changing its argument, we can turn the LED on and off.
Practical Part
After learning the basics, let's try writing a complete LED blink program. We will use all the knowledge we have gained: from variables to functions.
Let's write a program that blinks the LED on the Control Deck:
#include <LittleRobot.h>

LittleRobot robot;

const int pauseTime = 500;  // pause between blinks
const int repeatCount = 3;  // number of repetitions

void blinkRobotLed(int count) {  // the parameter controls repetitions
  for (int i = 0; i < count; i++) {
    robot.LED(1);  // on
    delay(pauseTime);

    robot.LED(0);  // off
    delay(pauseTime);
  }
}

void setup() {
  Serial.begin(9600);  // the speed must match the one in Serial Monitor
  robot.begin(true, true);

  Serial.println("Program started");
  blinkRobotLed(repeatCount);
  Serial.println("Program finished");
}

void loop() {

}
At the beginning of the program, the LittleRobot library is included, and then the robot object is created. In setup(), Serial Monitor is started and the robot is initialized. Through the robot object, the program accesses ready-made library commands. For example, the command robot.LED(1) turns on the robot LED, and robot.LED(0) turns it off.
Next, two constant values are set in the program: pauseTime and repeatCount. The value pauseTime controls the pause time between turning the LED on and off, and repeatCount sets the number of repetitions.
After that, the function blinkRobotLed() is created. It receives the value count and uses it in a for loop. Thanks to this, the function can blink several times in a row. In our case, the value repeatCount is passed to the function, so the LED blinks three times.
Using the skills you have learned, study every line of code and upload the program to the robot. As a result, the LED should blink 3 times with a 500 ms delay, and messages about the start and end of the program should appear in Serial Monitor.
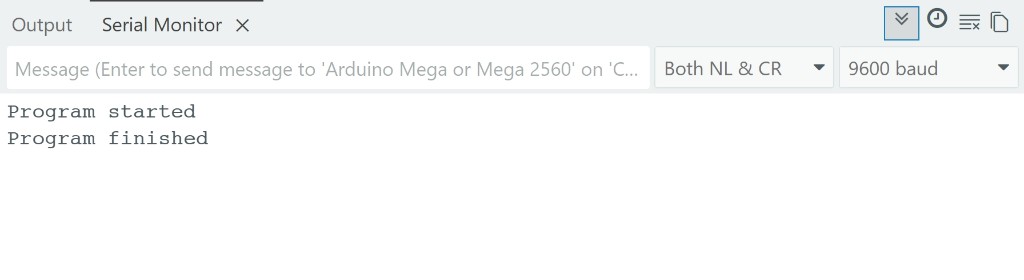
Try changing the variable values and see what happens. After practicing, move on to the next lesson!